Let’s do a short GetResponse review in this article. This email list-building service is not that famous among digital marketers. Yet, GetResponse has a team with 15 years of experience and now is proud to host 350,000 customers in 183 countries.
GetResponse offers high-quality and empowering services, helping online marketers in building a highly targeted list of clients. With responsive email design, WYSIWYG email template builder, and hundreds of ready-to-use email templates, GetResponse is really something to pay attention to, when choosing the best email list building service.
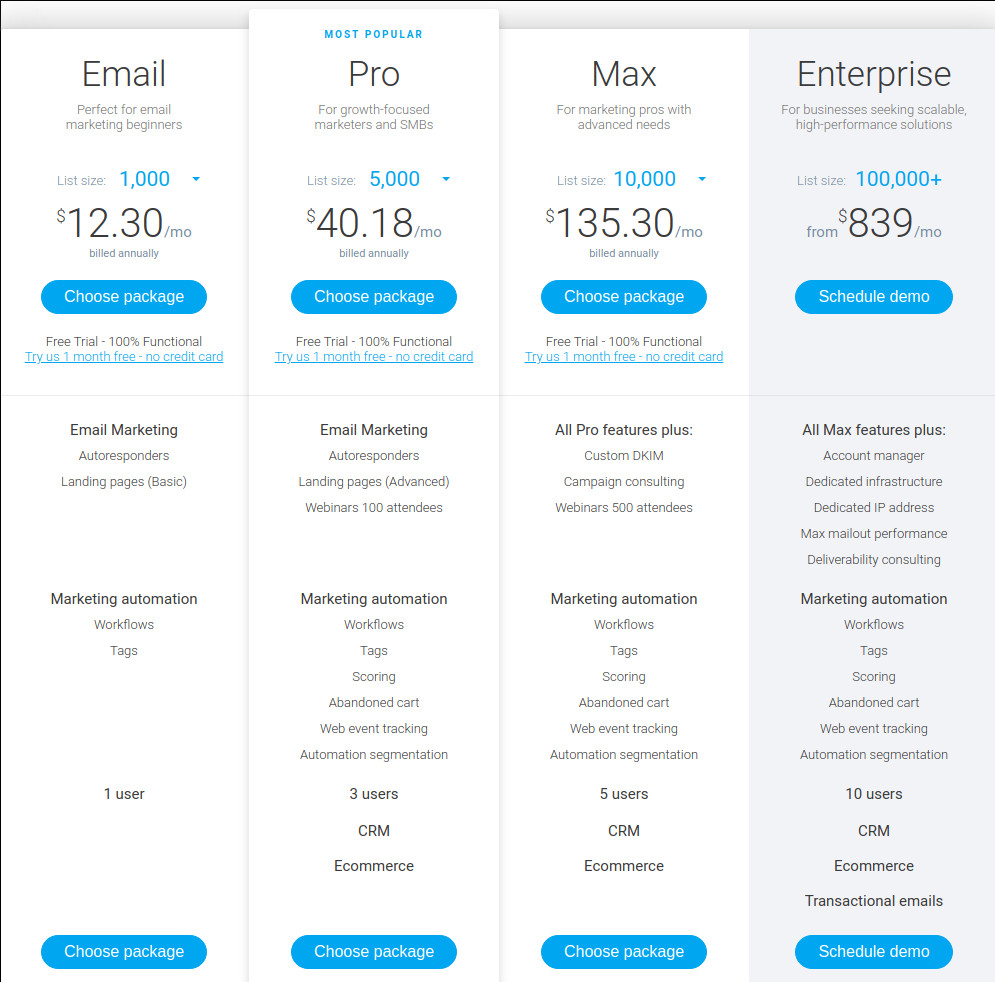
What are the prices for GetResponse? Review the available plans.
Prices of using the GetResponse email list builder, start from as low as 12$ per month with a basic plan (if you choose an annual subscription). Getting as high as needed in case you are planning to expand your business.
The most popular plan, which includes all features for the marketing automation, and allows up to 3 users on the same account, starts fro, 40$ per month if billed annually, or 49$ per month, if you choose monthly billing. Even if you subscribe to the annual plan, you are eligible for a 30-day FREE trial, and no credit card is required for you to start.
Additional features of GetResponse. Overview of the advanced tools.
GetResponse is different from their competitors since most of the email marketing services offer only the basic features like building the email list and the autoresponder. GetResponse in contrast is a feature-rich email marketing platform, that includes:
- email lists builder
- landing page builder
- marketing automation with a lot of customization available
- and last but not least – the ability to host the webinars
GetResponse is an all-in-one solution for those, who are not willing to spend a lot of money and time, trying to combine different services.

The Sign-up process
Now, let’s see what GetResponse email marketing has to offer behind its fancy user interface.
The entire list of features is available during the trial period.
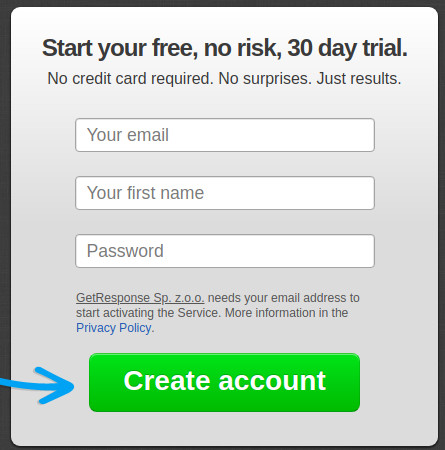
When signing up for a free trial account in GetResponse, you need to fill in this simple form, that needs your email, name, and password.
As a few final steps, you have to activate your account, by clicking the link in your mailbox, and after that’s done, you have to provide your mobile phone number and fill in your personal details. Just to make sure you have all the 30-days free trial features available.
You need to fill in your first and last name, address, city, and street. And then, click the confirmation button. And a final step is to enter the confirmation code, you got to your mobile phone number. So, just click the Send Code button, and once received, type your code in, and confirm the popup, by clicking on the verify button.
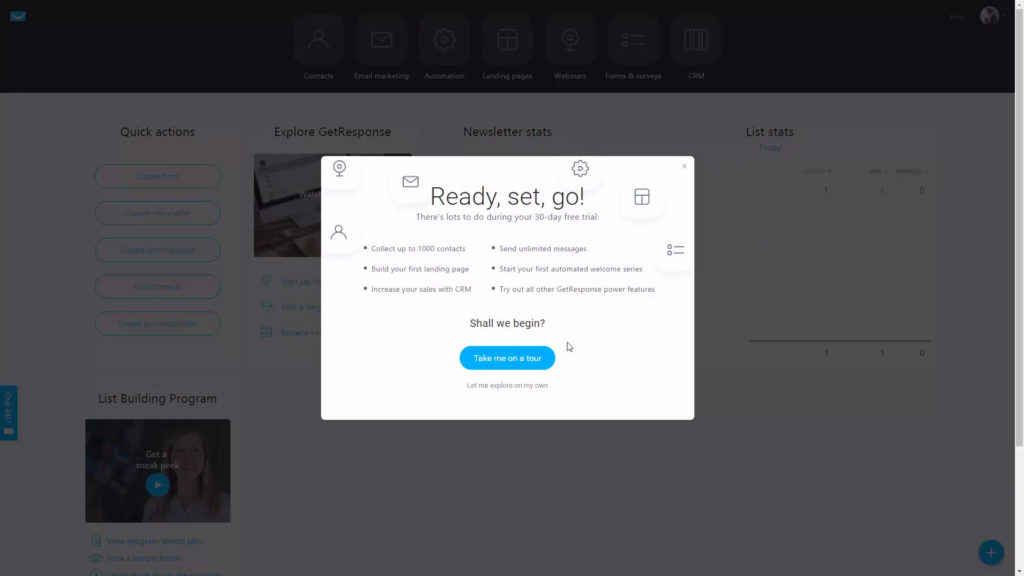
After a few seconds, you are proudly presented with the GetResponse control panel. At the time of your first use, you are guided with the first-time login tutorials. Feel free to read the tutorial text, when signing in to your free account.
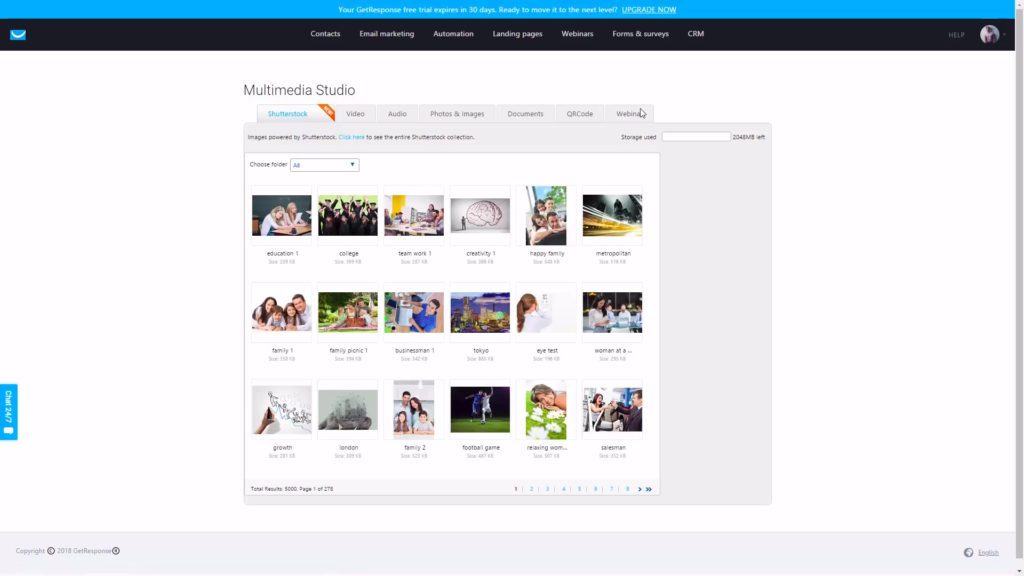
One more nice feature I really like about GetResponse is that they offer a free collection of Shutterstock images that can be used when creating email templates, landing pages, webinar pages. It’s nice to know you have this collection.
Creating the Autoresponder
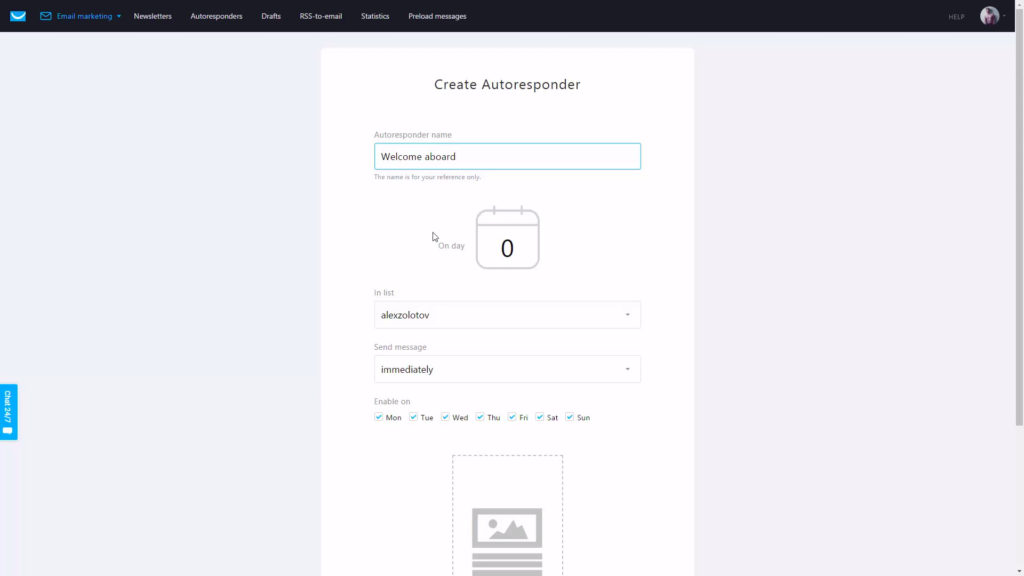
Now comes the fun part. Let’s get to the process of creating our very first Autoresponder with GetResponse. Setting up a new Autoresponder has never been easier. All you need to specify, is the name, email list which needs to be associated with this Autoresponder, and also you can choose when to send your Autoresponder email. You can opt to send it right away, or after a specific delay. You can also choose on which days the Autoresponder should and should not be sent. The most important part is that you need to create an email, or use an existing one. Now, let’s see how to create a new email.
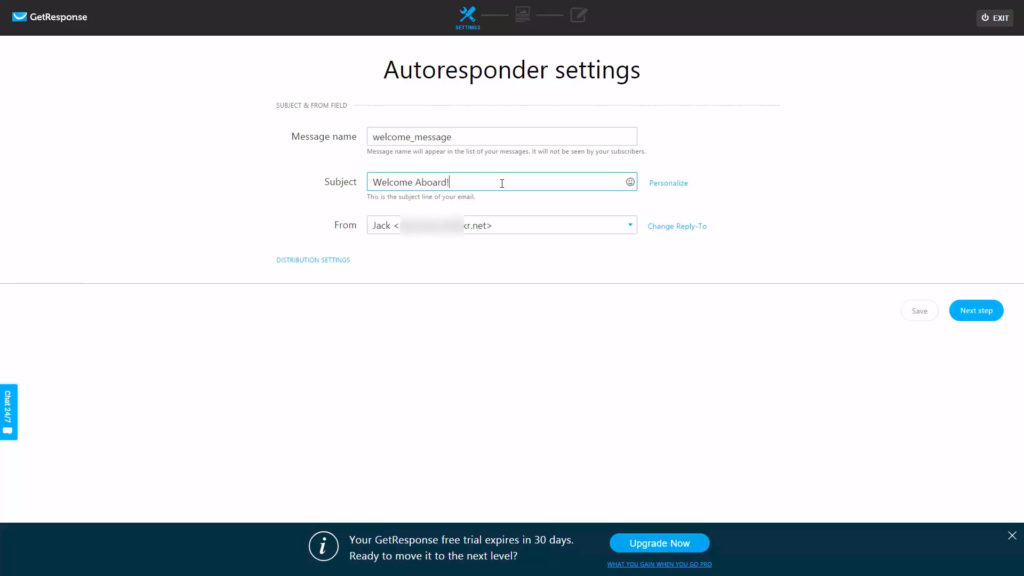
Creating the email is pretty easy, and starts with typing in the name, subject, and the sender email (you can have multiple sender emails in GetResponse).
Choosing the email template. Review available responsive designs.
Moving to the next step. You need to choose one of the hundreds of ready-to-use email templates. You have quite a lot of different options here. All the templates are sorted by categories, so it is easy to navigate through this large list.
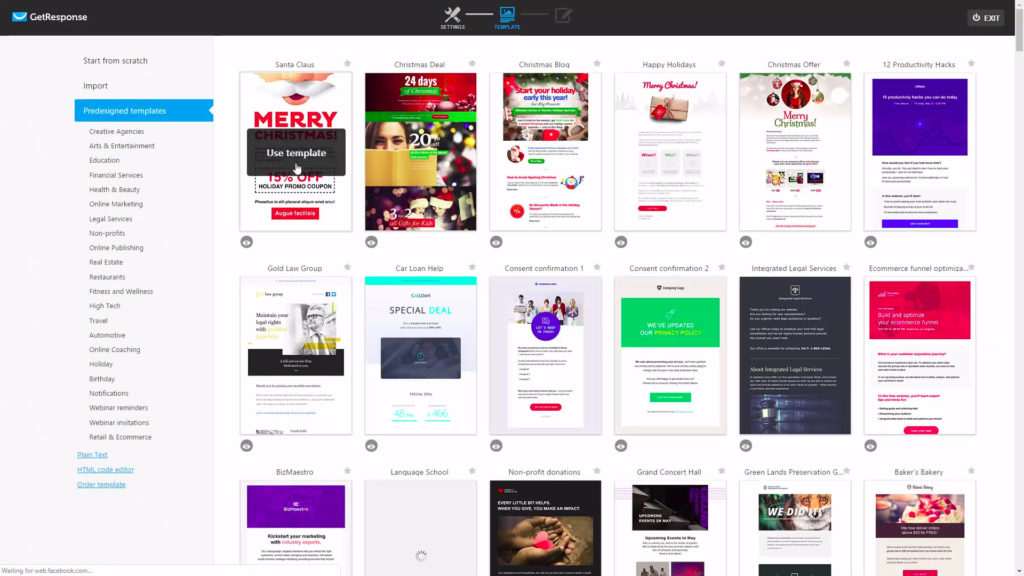
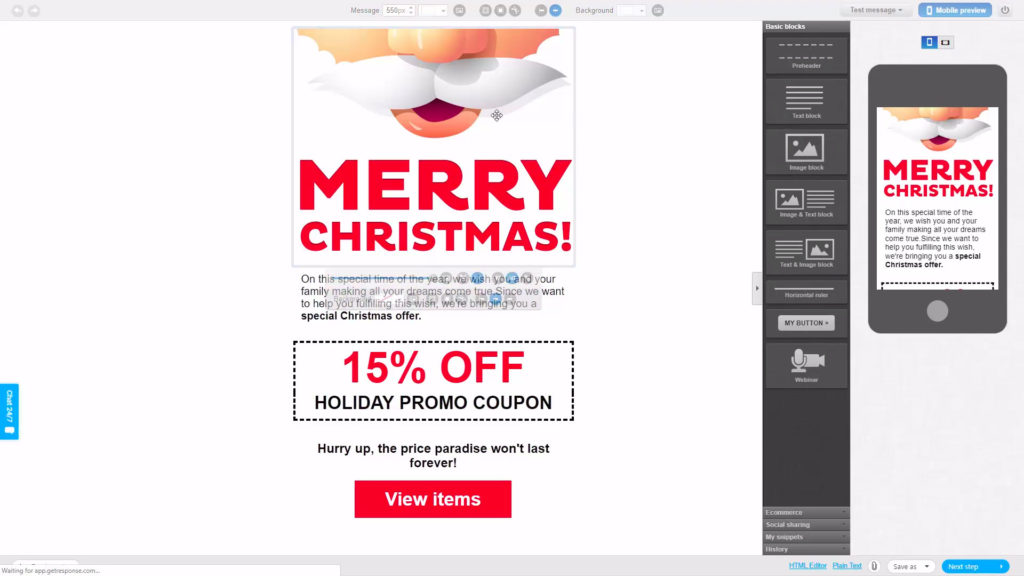
We are gonna be using this simple and nice-looking Christmas sale template. After choosing the template you are free to express your creativity with this amazing, feature-rich what you see is what you get visual email template editor. Changing the size of the element. Reordering the elements. Changing the font style and color. Every single customization option you can think of is ready to use.
For this email, let’s change the description text. We are not going to be creating a real copy that sells at the moment, but we rather keep it simple and replace the default text. We are also going to add the image from the included Shutterstock image gallery. A unique feature, offered by GetResponse only. Let’s choose a nice, happy mood image. We can resize, and customize its look and feel. Add some shadow or the borders. This editor has limitless potential.
We are also going to change the button text, and link of the page, where we want to send our prospect after the button has been clicked.
We are going to reorder items a little just to make this email look a little bit more customized.
After we’ve finished creating the email, we need to click the next step button.
Putting it all together
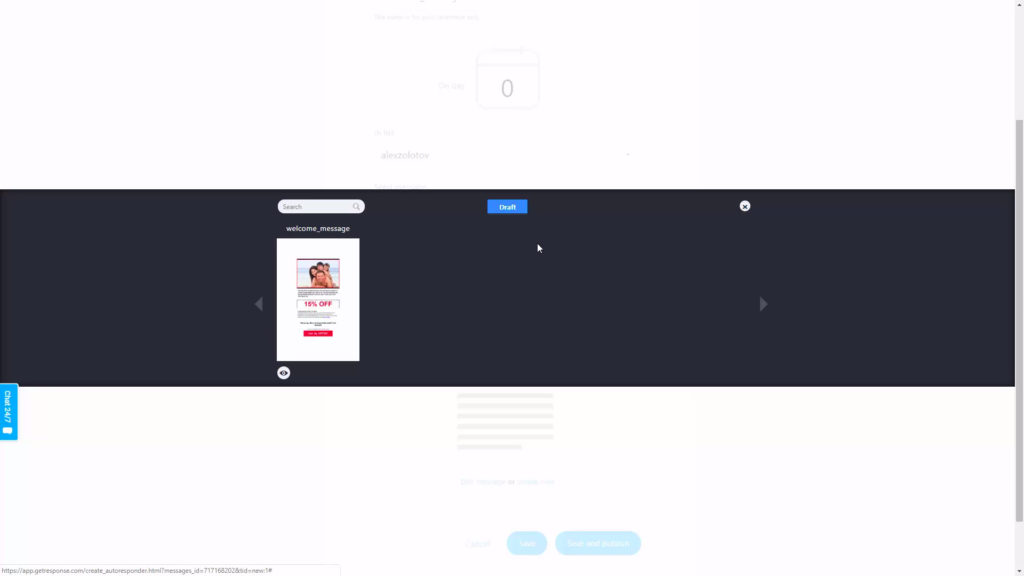
After we’ve finished creating the email template. We now can finalize our new autoresponder. We can click to choose a message to send in case we had different email templates created already. As of now, we have only one created so far. Now we can just click save and publish, and we are basically good to go.
Creating the landing pages. Drag and Drop editor overview.
Next feature, we are going to get our eyes on – is the landing pages. We are not able to review all the features of GetResponse, as this article is not meant to be long, but you are always welcome to check the GetResponse 30 days free trial, just don’t hesitate to check that link in the description down below.
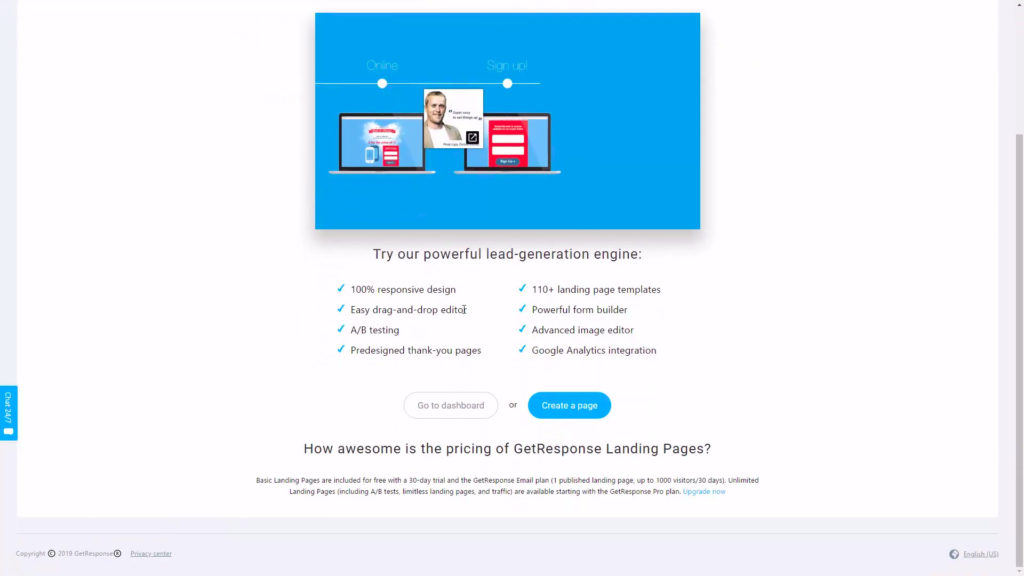
As you can see, you can quickly access landing page creator, via the dashboard’s main menu. Once, you’ve clicked here, you are presented with the beginners introduction for landing pages. It’s a nice video, and I highly recommend watching it, once you signed up for the free account. Now, we’re going to skip this video, and move on further to creating the landing page.
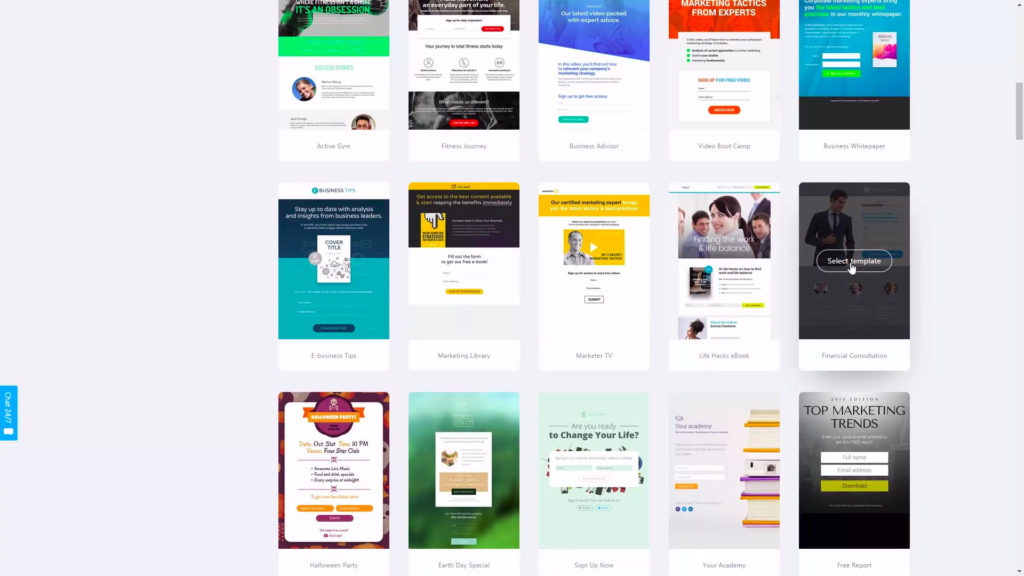
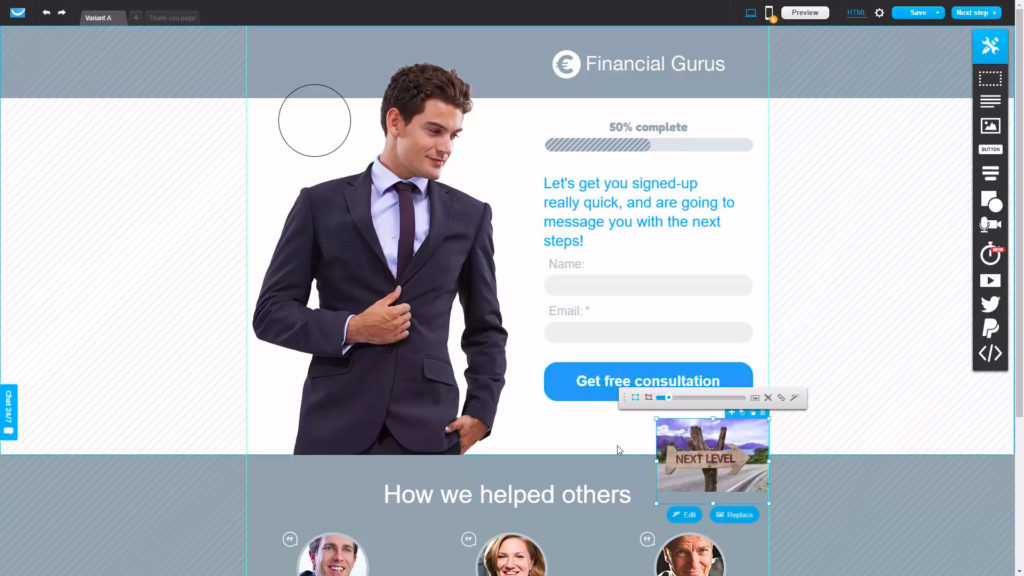
The process is quite similar to that of the email template. You are able to choose any of the numerous landing page templates, so you won’t spend a lot of time and money, and you can effectively create the professional landing page on your own. From these different categories, we are going to choose the opt-in type landing page. Let’s just use this one. First step is to specify the landing page name. And now you are ready to edit and customize your professionally looking landing page, with this nice and easy to use landing page builder.
Landing page editor
This is a visual landing page editor, that offers a rich variety of features for changing the look and feel of the landing page. You can edit the list of fields you want your prospect to fill in, the color theme, fonts, background, and images on your opt-in landing page. As you may have noticed, GetResponse makes it easy to create responsive mobile-first landing pages. The editor allows adding pictures, shapes, and lots of other elements.
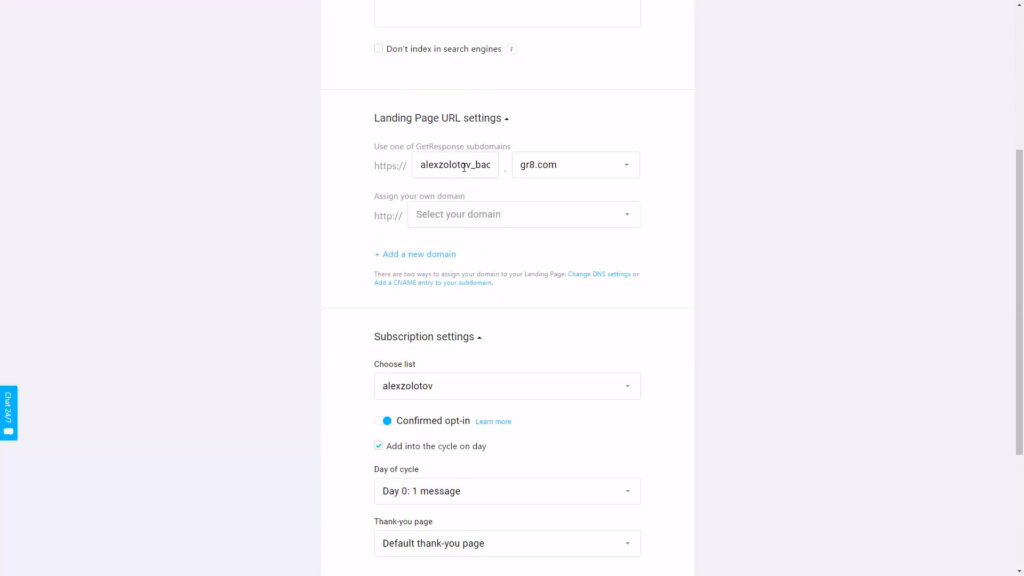
After you’ve finished designing your landing page, you will need to fill in some settings, like page title, and URL, which affect the SEO of your offer. You might want to leave these settings with the default values for now.
The last step is to choose, which email list, this landing page should be associated with.
Saving and testing the landing page
You are able to also specify the newsletter sequence settings here, and the Thank you page. At the bottom – you are able to choose the conversion tracking for the Google Ads, as well as the analytics and remarketing settings.
Once the page is ready, we can save and publish it, and now, let’s go and test how it works from the customer’s perspective.
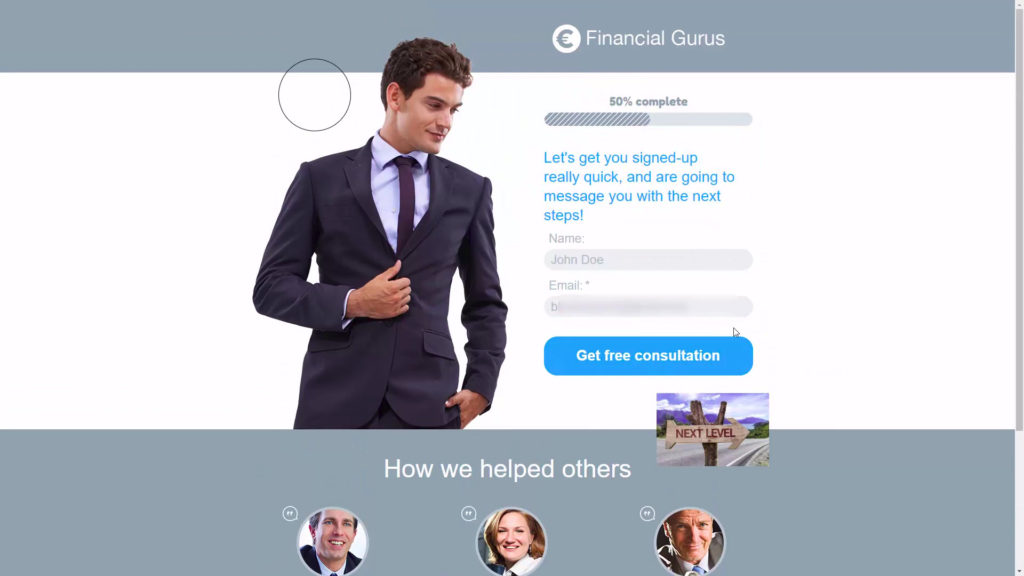
We are just signing up with a fake name and email, for sake of emulating the real prospect’s actions on the landing page.
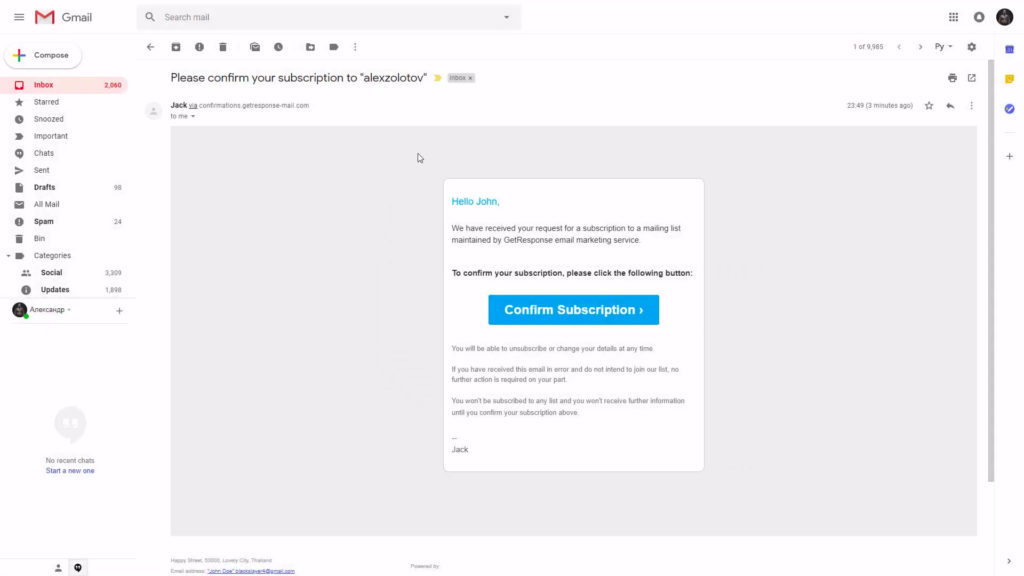
After clicking the button, we are redirected to a default Thank You page. Now, let’s go to our fake user’s message box, and see if we got the email from the GetResponse server. We have received this email, and now we just need to click the confirm button.
From now, the email address and the name we have entered should have been added to our default email list. Let’s check if this is the case. Going to the dashboard, we can see that we have one new subscriber, and this is the user we have just added, by emulating the customer opt-in process. Awesome! You may choose which actions you wish to perform on your subscriber.
Bottom line
GetResponse is really amazing email marketing platform. It can boast a nice and easy user interface. Cheap price. Lots of famous clients using it. Support also works quite well and is very responsive. Depending on the plan you choose, you may even get campaign consulting services included.
You may also find it useful to see the comparison of GetResponse vs SendInblue and GetResponse vs AWeber.
I personally enjoy GetResponse because it does not just offer a simple email building service, but also, gives a lot more features for its prices. The landing page builder is a must-have for every successful online marketer. You don’t have to purchase an additional subscription just to get the landing page constructor and hosting. You are going to enjoy using this all-in-one marketing platform.

This article is just a short overview of what GetResponse is capable of. To get yourself confident and more aware of the entire list of features of the GetResponse, don’t hesitate to get the free trial for 30 days.

![GetResponse vs ActiveCampaign: Who is the winner? [June 2020] GetResponse vs ActiveCampaign: Who is the winner? [June 2020]](https://softommando.com/wp-content/uploads/2020/05/activecampaign-vs-getresponse.jpg)
